badge
Latest Posts

How to send a Secured Encrypted Mail from Gmail?

- Saturday, November 15, 2014 No Comments
encrypt_gmail_account You might don't know that there is a very use trick to Encrypt any Email and send it to your Friend, by which you can make a secure email, which will not open unless you didn't decrypt that email which you have secured by giving a Decrypt Password.

Encryption can be done by using a very useful extension called "Secure Gmail" which only works in Google chrome web browser. This Extension will encrypt your Mail send from your Gmail account and to whom you send that Encrypted Email will receive a Weird Text, which wouldn't have any club to check out what is written inside that Mail, so to Decrypt that Mail. Mail Receivers have to give a Password Assigned by you to read that mail in a normal way.

Currently imagine somebody hacks into your Friends Gmail Account or somebody manages to intercept that email then you just don't need to Worry this Secure Gmail Extension will secure your Mail from all kinds of Threats and Hackers, Because without entering a correct password, there is no way to open and read that Email.

Now to do it, Here we Go... :)

1. "Secure Gmail" Extension is available for Free for Download form the Internet. Download Secure Gmail.
After you install this Extension, you may need to reopen your Chrome browser.
2.  Now open you Gmail Account, and there you will see a Lock button next to Compose button.
Gmail_with_encrypt_lock_button

3. Whenever you want to create Encrypted Email, then click on Lock button.
Type: "your_friends_Gmail_ID", Subject: "your_desire_subject" and type your: "Secret_Message."

Encrypted_Mail_box

4. After you finish your typing, click Send Encrypted, then a pop window will appear saying to type your Encrypted Password and Hint, type that and click Encrypt and Send.

password_for_encrypt_your_Email

5. Important: now tell your Password to your Friends, so that he/she can Decrypt and read your Secret Message.

6. When he/she receives your Encrypted Mail then, it will look like this,

encrypted_Email

7. To Decrypt, Click on the Link above that weird Message saying Decrypt message with password, then Password Window will appear.

Password_to_encrypt_Email

8. Now when your friend type the Password which you have given in Step 4 then only your friends will be able to access that secret message.

Decrypted_email

How to transform Windows XP, 7, 8 & 8.1 into Windows 10

- Saturday, November 08, 2014 No Comments
This Transformation pack is for those who like Windows 10 User Interface and want to experience it in their own computer, but don't want to install fresh version of Microsoft OS, so this Article will work out.

You may also like our exclusive Transformation Tutorial:
Transform Windows XP & 7 into Windows 8.1
Transform Windows 7, 8 & 8.1 into Windows 9 (Rumor)
Transform Windows XP, Vista, 7, 8 & 8.1 into Mac OS X Yoesmite
Transform Windows XP, Vista 7, 8 & 8.1 into Mac OS X Mavericks
Transform Windows Vista, 7, 8 & 8.1 into Mac OS X Snow Leopard

This Transformation will make your Windows XP, 7, 8 & 8.1 look-n-feel like Windows 10. This Transformation Pack is made by our old friend "WindowsX."

Win10-trasformation-pack

This Pack contain:

1. Windows 10 icon, Theme, Wallpaper, Booting and Logon Screen for XP/7

2. UxStyle memory patching

3. Safe Customzsation of Genuine Windows 10 System File

4. Custom Start menu for XP, 7, 8/8.1

5. Aero’s auto-colonization Feature, and lot more inside

Required:

1. NET Framework 2.0 - For Start Menu

2. NET Framework 4.0 - For Newgen

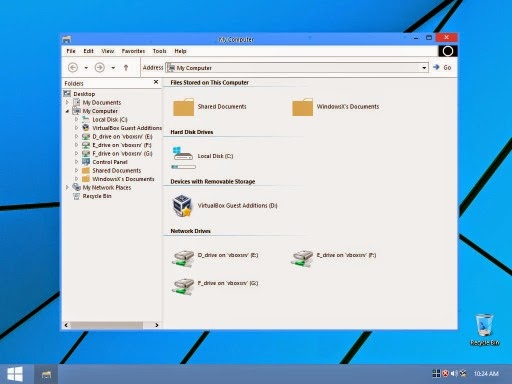
Below is the Preview of all the supported OS, Please Check before Downloading 

Windows 8/8.1
win8-8-1-preview-of-Win10-trasformation-pack

Windows 7
win7-vista-preview-of-Win10-trasformation-pack

Windows XP, Vista
winXP-vista-preview-of-Win10-trasformation-pack
This Transformation Pack will also Work on Vista, but we don't have preview of it.
You can Download from the following link:
Download Windows 10 Transformation Pack


If you want to change Start Menu Botton


Right Click on Taskbar Start Menu Botton > Setting > Start Menu > under Start Menu Botton Style >  Choose Style 1. (Windows 8/8.1)