badge
Latest Posts
Browsing Category "Windows XP"

How to get Windows 10 look like Start menu in Windows 8/8.1, 7 Vista & XP

- Tuesday, January 06, 2015 No Comments
Microsoft has released his new operation system, Windows 10 which is just a technical preview version and free for download. In which microsoft has add back the Start menu after the huge demand from user, as windows 8, 8.1 and 10 comes with metro theme so Microsoft have also tried to make Windows 10 Start Menu a combination of both Windows 8 metro start menu and classic start menu.

Windows 10 start menu will not just include the shortcut to the installed software but it will also show the live tiles of installed apps like weather, people, music..etc.


Windows10-Start-Menu

if you are interested in using Windows 10 look like Start Menu any other Windows version like Windows 8/8.1, 7, Vista or XP then this article will work for you. 

This great skin of Windows10 start menu is made by our friend PeterRollar, but I have done Some more customization in the look of this start menu, to give more great look to your desktop and more look-n-feel experience to this start menu, If you want to download PeterRollar edition then follow the link .

 Now below is the preview of my Start Menu skin: of all the four available colors:
there are just four colors available for use:- Red, Blue, Green and Brown.


Windows10-StartMenu-in-Windows8.1/8-7-Vista-and-XP
now without wasting time lets start the topic:
1. If you haven't yet then go ahead and Download Vistart.

2. Now Download Windows10 StartMenu Skin.

3. After when have Downloaded the skin then you will get a *.zip file, Extract it.

4. after extracting you will get all the 4 color variant of Windows 10 as listed below:
-Windows 10 Start Menu (Red),
-Windows 10 Start Menu (Green),
-Windows 10 Start Menu (Blue),
-Windows 10 Start Menu (Brown), and
-English.xml (supported language file)

5. Now close the Vistart by right-click on vistart icon from system tray and click on Exit.

6. now copy all these extracted files and go to  %appdata%\ViStart\_skins by typing it in RUN (win key + R) dialog box. 

You have successfully installed Windows10 Startmenu skin, now just apply that skin by:

7. Open Vistart and go to option by right-click on vistart icon from system tray and click on Options.


Select-StartMenu-Color-Variant

by doing this you have applied Windows10 StartMenu skin. it's not that much ;)

8. Go to Configure Tab and set all that right-side link like Documents, Control Panel, etc to Don't show.


Disable-right-side-link

That's it, now you have successfully applied Windows 10 Start Menu in your Windows.

How to transform Windows XP, 7, 8, 8.1 & 10 into Mac OS X Yosemite

- Saturday, December 06, 2014 No Comments
Recently, Apple Inc. has released his new version of Operating System, which is Mac OS X Yosemite and in just a week after the release of this OS, We have got lots and lots of mail for its transformation pack for Microsoft OS. So finally today we are sharing an article for it.

You may also like our exclusive Transformation Tutorial:
Transform Windows XP & 7 into Windows 8.1
Transform Windows 7, 8 & 8.1 into Windows 9 (Rumor)
Transform Windows XP, Vista, 7, 8 & 8.1 into Windows 10
Transform Windows XP, Vista 7, 8 & 8.1 into Mac OS X Mavericks
Transform Windows Vista, 7, 8 & 8.1 into Mac OS X Snow Leopard

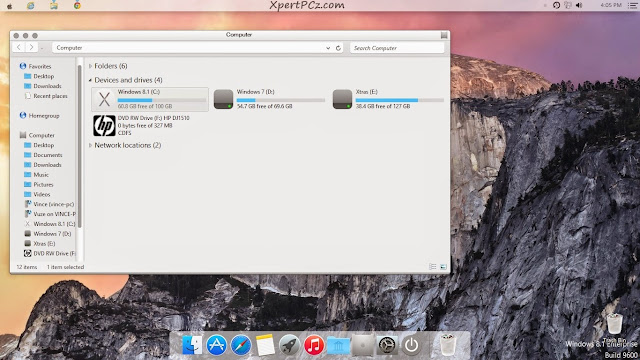
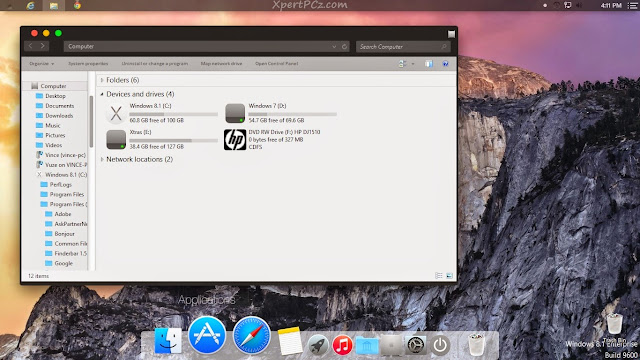
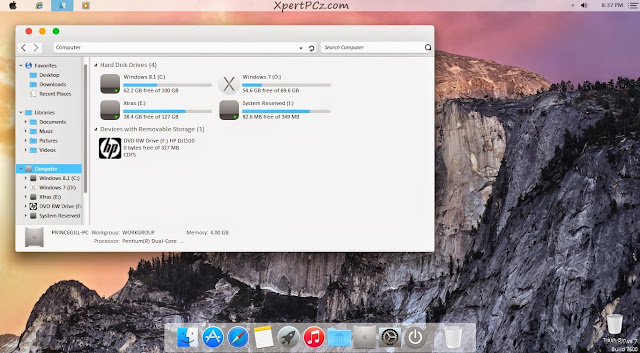
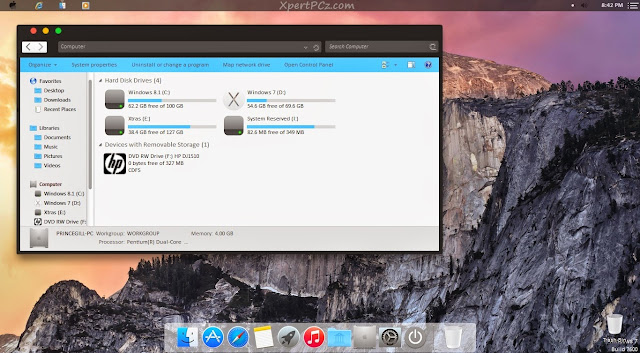
This is a Transformation pack to make your XP, Vista, 7, 8 and 8.1 look-n-feel like Mac OS X Yosemite, Which is made by our old friend "WindowsX."

Mac_os_x_yoesmite_transformation_pack_for_windowsXP_Vista_7_8_8.1_10
Features:

1. Mac OS X Yosemite icon, Theme, Wallpaper, Booting and Logon Screen for XP/7

2. New Helvetica Neue fonts

3. Taskbar Transparency fade-in

4. Safe Customization of System File

5. Available for all Language Versions

6. Support both 32 bit (x86) 64 bit (x64), and lot more inside

Below is the Preview of all the supported OS, Please Check before Downloading.

Windows 8 / 8.1
     -White Theme
Win8-8-1-white-preview-of-Yosemite_transformation-Pack
     -Black Theme
Win8-8-1-black-preview-of-Yosemite_transformation-Pack

Windows 7
     White Theme
Win7-white-preview-of-Yosemite_transformation-Pack
     Black Theme
Win7-black-preview-of-Yosemite_transformation-Pack
Windows XP / Vista
This Transformation Pack will also work for XP and Vista, but we don't have any preview of it.
You can Download from the following link:
Download Mac OS X Yosemite Transformation Pack

This Transformation Pack doesn't contain Finder Bar so you can download from the link Below:
Download Finder Bar 1.5.

How to transform Windows XP, 7, 8 & 8.1 into Windows 10

- Saturday, November 08, 2014 No Comments
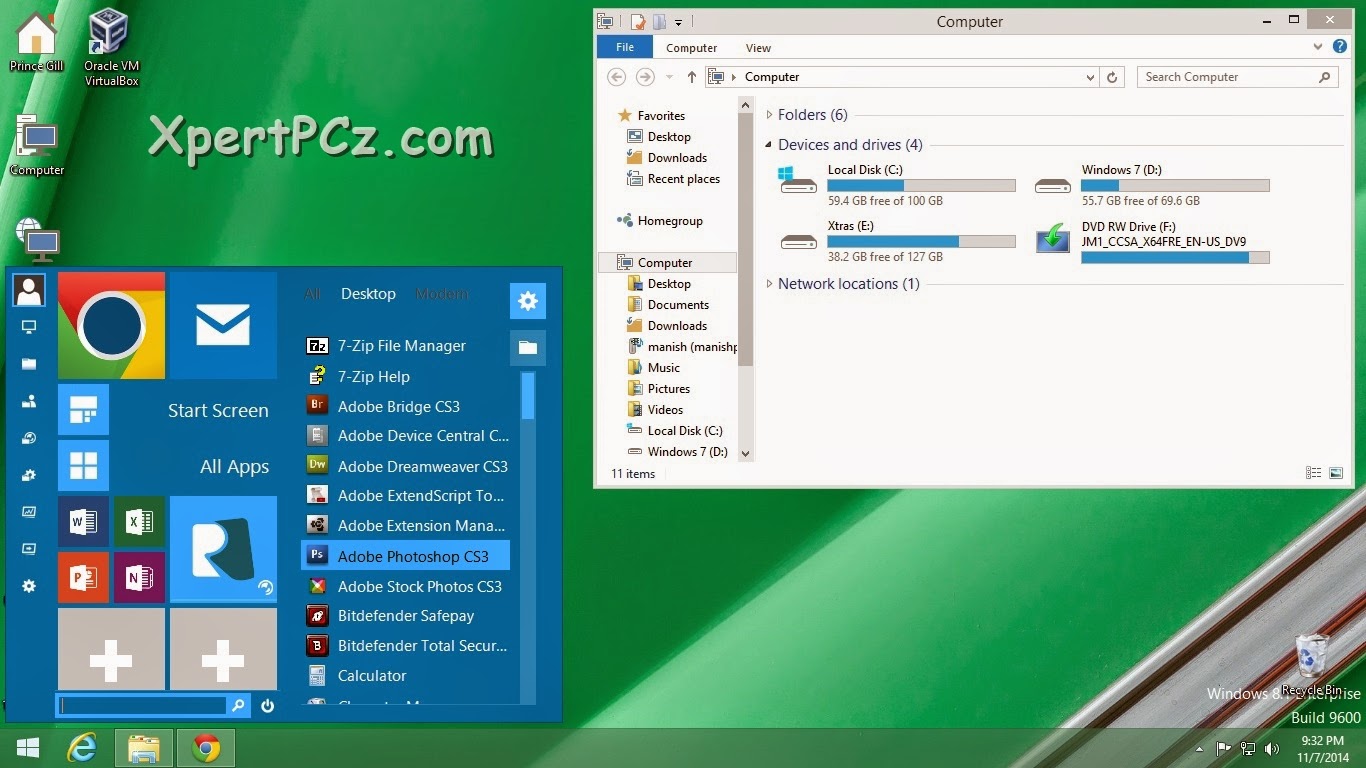
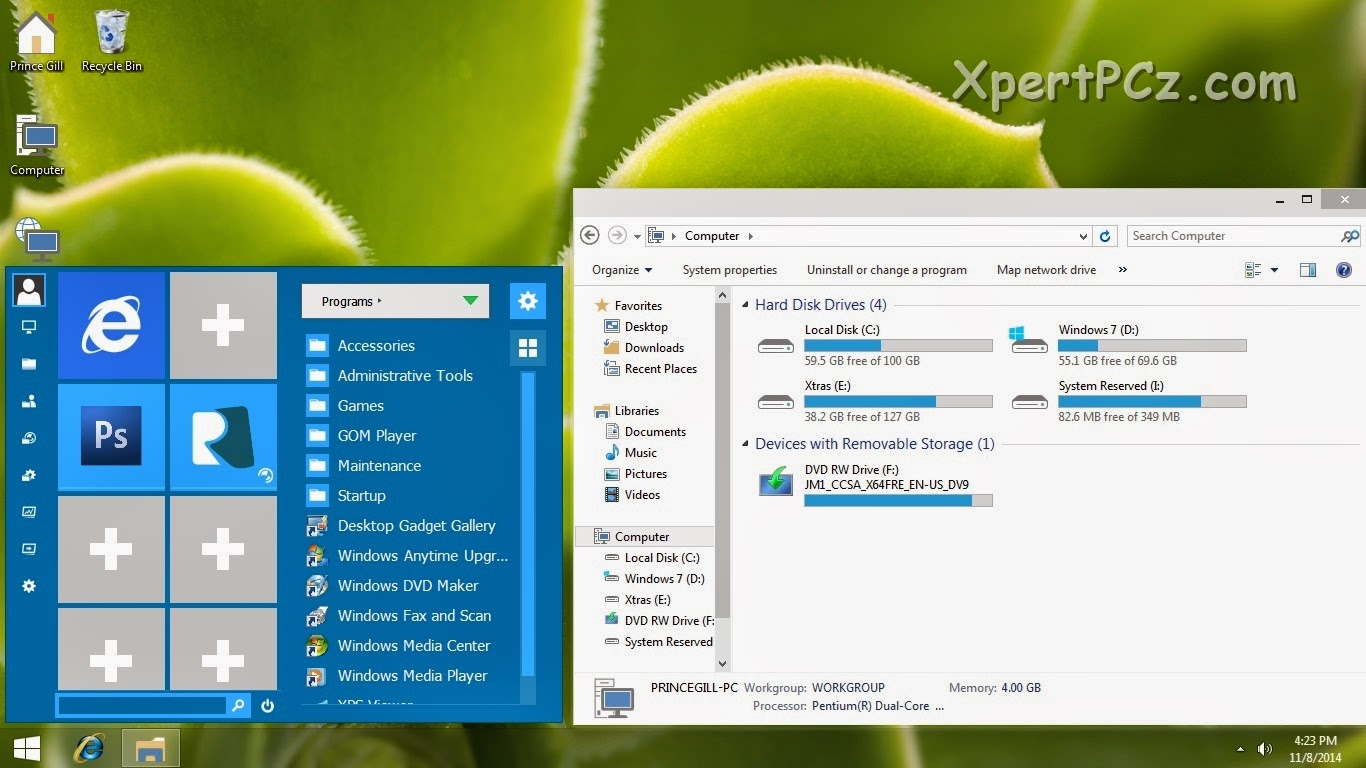
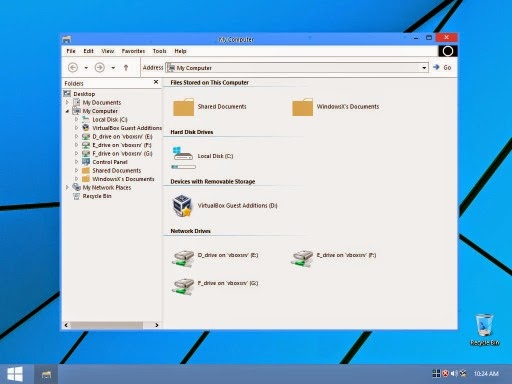
This Transformation pack is for those who like Windows 10 User Interface and want to experience it in their own computer, but don't want to install fresh version of Microsoft OS, so this Article will work out.

You may also like our exclusive Transformation Tutorial:
Transform Windows XP & 7 into Windows 8.1
Transform Windows 7, 8 & 8.1 into Windows 9 (Rumor)
Transform Windows XP, Vista, 7, 8 & 8.1 into Mac OS X Yoesmite
Transform Windows XP, Vista 7, 8 & 8.1 into Mac OS X Mavericks
Transform Windows Vista, 7, 8 & 8.1 into Mac OS X Snow Leopard

This Transformation will make your Windows XP, 7, 8 & 8.1 look-n-feel like Windows 10. This Transformation Pack is made by our old friend "WindowsX."

Win10-trasformation-pack

This Pack contain:

1. Windows 10 icon, Theme, Wallpaper, Booting and Logon Screen for XP/7

2. UxStyle memory patching

3. Safe Customzsation of Genuine Windows 10 System File

4. Custom Start menu for XP, 7, 8/8.1

5. Aero’s auto-colonization Feature, and lot more inside

Required:

1. NET Framework 2.0 - For Start Menu

2. NET Framework 4.0 - For Newgen

Below is the Preview of all the supported OS, Please Check before Downloading 

Windows 8/8.1
win8-8-1-preview-of-Win10-trasformation-pack

Windows 7
win7-vista-preview-of-Win10-trasformation-pack

Windows XP, Vista
winXP-vista-preview-of-Win10-trasformation-pack
This Transformation Pack will also Work on Vista, but we don't have preview of it.
You can Download from the following link:
Download Windows 10 Transformation Pack


If you want to change Start Menu Botton


Right Click on Taskbar Start Menu Botton > Setting > Start Menu > under Start Menu Botton Style >  Choose Style 1. (Windows 8/8.1)

How To Enable Telnet In Windows

- Saturday, May 24, 2014 No Comments
I have been doing the "Star Wars Telnet Hack," on the computers at school. However, if I have been wanting to do it at home, on my Windows Vista / 7 / 8 or 8.1. So We searched around, and found how to enable telnet on Vista / 7 / 8 or 8.1 Platform.
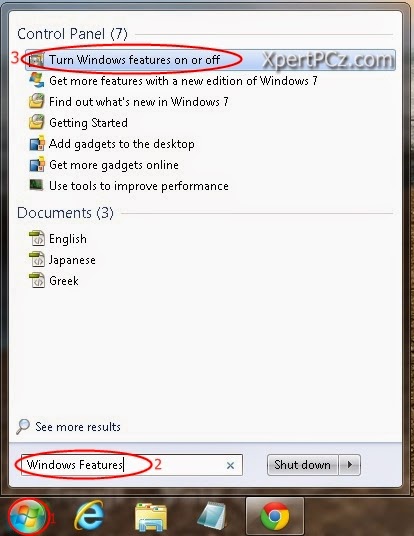
  •  Open "Start" Menu Search "Windows Features" 
start-Menu-XpertPCz
  • Click on "Turn Windows Features On or Off"
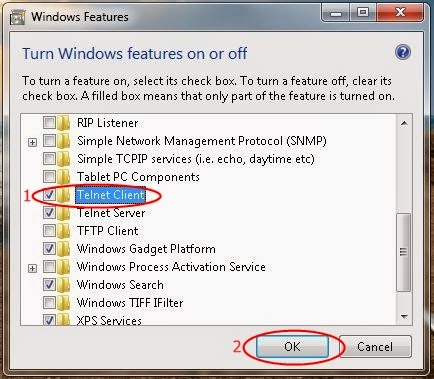
  • Now a new window opens. In the new window, Tick On "Telnet Client" And Click on "Ok". It Will Take Time To Setup.
Run-XpertPCz

Done, Now you Can use Telnet Service on your CMD.

Watch Video Tutorial:-


How to Fix Windows Genuine Warning?

- Tuesday, March 25, 2014 No Comments
Windows 7 have been known as one of the popular operating systems published by Microsoft OS. Even if Windows 8/8.1 is the latest version from Microsoft, lots of users are still using Win 7 OS. You might be one of them and even experienced the warning such as 'This copy of Windows is not genuine.' Today I am here to show you a simple trick through which you can make Win 7 genuine without using any software. You just need an access to the administrator privileged command prompt.

You would get the problems such as blank wallpaper with "Not Genuine" warning, Continuously "Not genuine" message prompt, performance degradation of the system.

Guide is Below:-

  • Click on Start. search for CMD.
  • Open "Command Prompt" with admin privileges. For that, just right click on CMD and select "Run as administrator".

How to fix windows 7 genuine warning?

  • Type the command as "slmgr -rearm" and hit enter.


  • Now Windows Script Host popup will appear which will notify that you have successfully completed that command and you need to restart your system.

Done, You have made your Win 7 system genuine!

List of Windows Run Commands

- Thursday, March 20, 2014 No Comments

Run command is the executable name for a particular program. In other words, a run command is the name of the actual file that starts an application. Knowing the run command for a particular program can be helpful if Windows isn't working properly, but you do have access to a command line interface, or if you'd just like to access a particular program more quickly.

Open RUN.

  1. Open Start Menu. 
  2. Click or search for "Run" toolbox.
  3. Enter below listed commands into text box. 
  4. Click on Ok to open specific utility.
Program NameRun Command
About Windowswinver
Add a Devicedevicepairingwizard
Add Hardware Wizardhdwwiz
Advanced User Accountsnetplwiz
Authorization Managerazman
Backup and Restoresdclt
Bluetooth File Transferfsquirt
Calculatorcalc
Certificatescertmgr
Change Computer Performance Settingssystempropertiesperformance
Change Data Execution Prevention Settingssystempropertiesdataexecutionprevention
Change Printer Settingsprintui
Character Mapcharmap
ClearType Tunercttune
Color Managementcolorcpl
Command Promptcmd
Component Servicescomexp
Component Servicesdcomcnfg
Computer Managementcompmgmt
Computer Managementcompmgmtlauncher
Connect to a Network Projectornetproj
Connect to a Projectordisplayswitch
Control Panelcontrol
Create A Shared Folder Wizardshrpubw
Create a System Repair Discrecdisc
Credential Backup and Restore Wizardcredwiz
Data Execution Preventionsystempropertiesdataexecutionprevention
Default Locationlocationnotifications
Device Managerdevmgmt
Device Pairing Wizarddevicepairingwizard
Diagnostics Troubleshooting Wizardmsdt
Digitizer Calibration Tooltabcal
DirectX Diagnostic Tooldxdiag
Disk Cleanupcleanmgr
Disk Defragmenterdfrgui
Disk Managementdiskmgmt
Displaydpiscaling
Display Color Calibrationdccw
Display Switchdisplayswitch
DPAPI Key Migration Wizarddpapimig
Driver Verifier Managerverifier
Ease of Access Centerutilman
EFS REKEY Wizardrekeywiz
Encrypting File System Wizardrekeywiz
Event Viewereventvwr
Fax Cover Page Editorfxscover
File Signature Verificationsigverif
Font Viewerfontview
Getting Startedgettingstarted
IExpress Wizardiexpress
Import to Windows Contactswabmig
Install or Uninstall Display Languageslusrmgr
Internet Exploreriexplore
iSCSI Initiator Configuration Tooliscsicpl
iSCSI Initiator Propertiesiscsicpl
Language Pack Installerlpksetup
Local Group Policy Editorgpedit
Local Security Policysecpol
Local Users and Groupslusrmgr
Location Activitylocationnotifications
Magnifiermagnify
Malicious Software Removal Toolmrt
Manage Your File Encryption Certificatesrekeywiz
Math Input Panelmip1
Microsoft Management Consolemmc
Microsoft Support Diagnostic Toolmsdt
NAP Client Configurationnapclcfg
Narratornarrator
New Scan Wizardwiaacmgr
Notepadnotepad
ODBC Data Source Administratorodbcad32
ODBC Driver Configurationodbcconf
On-Screen Keyboardosk
Paintmspaint
Performance Monitorperfmon
Performance Optionssystempropertiesperformance
Phone Dialerdialer
Presentation Settingspresentationsettings
Print Managementprintmanagement
Printer Migrationprintbrmui
Printer User Interfaceprintui
Private Character Editoreudcedit
Problem Steps Recorderpsr
Protected Content Migrationdpapimig
Registry Editorregedit
regedt32
Remote Access Phonebookrasphone
Remote Desktop Connectionmstsc
Resource Monitorresmon
perfmon /res
Resultant Set of Policyrsop
Securing the Windows Account Databasesyskey
Servicesservices
Set Program Access and Computer Defaultscomputerdefaults
Share Creation Wizardshrpubw
Shared Foldersfsmgmt
Snipping Toolsnippingtool
Sound Recordersoundrecorder
SQL Server Client Network Utilitycliconfg
Sticky Notesstikynot
Stored User Names and Passwordscredwiz
Sync Centermobsync
System Configurationmsconfig
System Configuration Editorsysedit
System Informationmsinfo32
System Properties (Advanced Tab)systempropertiesadvanced
System Properties (Computer Name Tab)systempropertiescomputername
System Properties (Hardware Tab)systempropertieshardware
System Properties (Remote Tab)systempropertiesremote
System Properties (System Protection Tab)systempropertiesprotection
System Restorerstrui
Tablet PC Input Paneltabtip
Task Managertaskmgr
Task Schedulertaskschd
Trusted Platform Module (TPM) Managementtpm
User Account Control Settingsuseraccountcontrolsettings
Utility Managerutilman
Version Reporter Appletwinver
Volume Mixersndvol
Windows Activation Clientslui
Windows Anytime Upgrade Resultswindowsanytimeupgraderesults
Windows Contactswab1
Windows Disc Image Burning Toolisoburn
Windows DVD Makerdvdmaker
Windows Easy Transfermigwiz
Windows Explorerexplorer
Windows Fax and Scanwfs
Windows Featuresoptionalfeatures
Windows Firewall with Advanced Securitywf
Windows Help and Supportwinhlp32
Windows Journaljournal
Windows Media Playerdvdplay
wmplayer
Windows Memory Diagnostic Schedulermdsched
Windows Mobility Centermblctr
Windows Picture Acquisition Wizardwiaacmgr
Windows PowerShellpowershell
Windows PowerShell ISEpowershell_ise
Windows Remote Assistancemsra
Windows Repair Discrecdisc
Windows Script Hostwscript
Windows Updatewuapp
Windows Update Standalone Installerwusa
WMI Managementwmimgmt
WMI Testerwbemtest
WordPadwrite
XPS Viewerxpsrchvw

How To install Android 4.4 Kitkat in PC

- Saturday, October 26, 2013 No Comments
There are many people who don't have Smart Phone, but they want to experience Android Apps, Games etc so here is an article which will definitely work for them, In this article. We (XpertPcz's team) is going to tell you a method which will, make you PC Work for both Android and Windows, On same one Computer. It doesn't require any special requirement, as is can run on any Microsoft Platform whether it is Windows XP/ Vista/ 7 / 8 or 8.1. But we will show you in Windows 8.1.

Here We go. :-)

To Run Android you must have this to Software's. (click on link to Download)


Follow this simple guide give below:

  • 1. Download Virtual Box, and install it in your computer. 

  • 2. Run it and click in New Button, In top left corner in Virtual Box

  • 3. A new window will open (Create Virtual Machine), Asking for, Name: Type: and Version:

  • 4. Type OS Name like "Android 4.4", In Type: Linux and In Version: other Linux., then Select Next.

Preview_Install_Android_in_PC_XpertPCz /></div>
<div>
<br /></div>
<div class=
  • 5. Now it will ask for Virtual Memory (RAM), let it be as recommended.

  • 6. Now it will ask you to create virtual hard drive. Click on its and proceed by next button.

  • 7. Now it will ask Hard Disk Type, then select VHD (Virtual Hard Drive)

  • 8. Now again it will ask for HDD now select Dynamic allocated.

  • 9. Then finally Create it by Clicking on create Button.
  • 10. Now go to Setting (on top left toolbar), and go to Storage tab,

  • 11. Now Under Control: IDE field, select Empty area select it then click on CD-ROM icon (in the corner near  to option menu saying IDE Secondary master).and another drop down menu will open saying "choose a virtual CD/ DVD disk file" and "host Drive F:" (here F:/ is a CD ROM drive letter) in that menu choose "choose a virtual CD/ DVD disk file"


  • 12. Locate your Downloaded Android x86.iso file, then hit OK


  • 13. Now "Start" (from top toolbar).

  • 14. Then choose Run Android x86 without installation.


Thats It now Android has completely installed in your PC, Get Ready to Use. :-)

if you have problem feel free to comment below.