Latest Posts
Tags:
Android
How to block unwanted incoming calls on your Android Phone?
-
Saturday, December 13, 2014
No Comments
Might you have get some calls from many service centers or customer care or from some other organisation asking you whether you want to take this or that and etc... When they call you once or twice a week then it fine, but what if, if you start get call from numerous organisation for 5-6 times a day or more than that and even in the odd hours of a day, then just simply ignoring or rejecting the phone call will not solve the problem.


One way to solve this problem is to go to the higher authority and register a complaint and then try to block that number but it may take long time and even it will waste your time also. So here is an even better solution which you can implement yourself also.

There is a useful app known as Call Control, it is free, simple and handy to use app, but it only works on an android phone, So now. How to use it.
1. Download and install Call Control app in your Android phone.
2. Open Call Control app and go to Black List.
1. Download and install Call Control app in your Android phone.
2. Open Call Control app and go to Black List.

3. In the Black list, Tap on the "+" button and then click on Phone Number.

4. Then in the space provided type any 10-Digit mobile number or type Caller Name if you have his or her number in your phone's address book.

5. Now click save button, and in the next screen, you will see all your black listed numbers.

Now whenever you'll get a call from your given black listed number then call control will automatically reject the call with letting you notice.
Now if a person is constantly changing his number and calling you repeatedly, then there is also a way to block that scenario.
Now if a person is constantly changing his number and calling you repeatedly, then there is also a way to block that scenario.
1. Just click on the "+" button in black list category.

2. Now Select Wild Card, and Enter the Area Pin Code (Zip Code).

5. Now click save button, and in the next screen, you will see all your black listed numbers.

Labels:
Android
Tags:
Android
How to send Scheduled SMS from your Android phone?
-
Friday, December 12, 2014
No Comments

Suppose you want to wish "Happy Birthday" to your best friends right at 12:00 AM (12 o'clock), but you are feeling sleepy, and unfortunately you fall asleep and at morning when you wake up you feel regret about it so in that situation this fantastic app will work for you. The name of this app is SMS Scheduler, so. How to use it?
1. Download SMS Scheduler and install it in your Android Phone.
2. Open SMS Scheduler, and click on Add button.
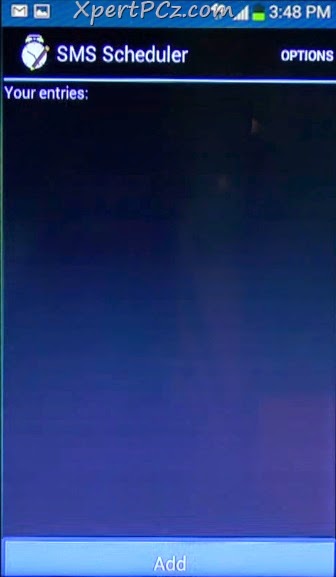
3. Now all you got to do is enter the Phone Number of your friend.
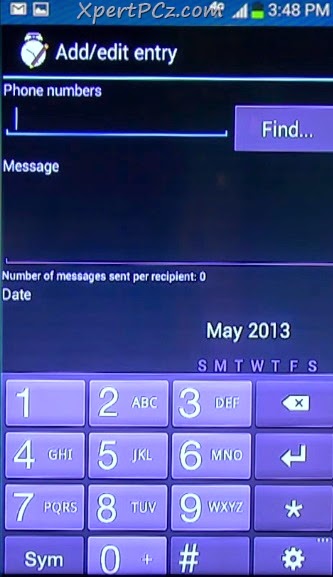
4. Type the massage you want to send. like "Happy Birthday" or "Happy Anniversary" etc.
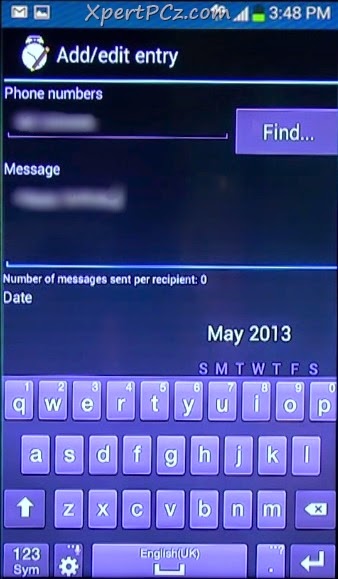
5. then select the Date and Time at which you want your SMS to be deliver.

6. Now Click on Done button.
Now exactly at the date and time you selected the SMS will be delivered to your friends and now, no matter if you fall asleep.
Labels:
Android
How to transform Windows XP, 7, 8, 8.1 & 10 into Mac OS X Yosemite
-
Saturday, December 06, 2014
No Comments
Recently, Apple Inc. has released his new version of Operating System, which is Mac OS X Yosemite and in just a week after the release of this OS, We have got lots and lots of mail for its transformation pack for Microsoft OS. So finally today we are sharing an article for it.
You may also like our exclusive Transformation Tutorial:
Transform Windows XP & 7 into Windows 8.1
Transform Windows 7, 8 & 8.1 into Windows 9 (Rumor)
Transform Windows XP, Vista, 7, 8 & 8.1 into Windows 10
Transform Windows XP, Vista 7, 8 & 8.1 into Mac OS X Mavericks
Transform Windows Vista, 7, 8 & 8.1 into Mac OS X Snow Leopard
This is a Transformation pack to make your XP, Vista, 7, 8 and 8.1 look-n-feel like Mac OS X Yosemite, Which is made by our old friend "WindowsX."
.JPG)
 -Black Theme

You may also like our exclusive Transformation Tutorial:
Transform Windows XP & 7 into Windows 8.1
Transform Windows 7, 8 & 8.1 into Windows 9 (Rumor)
Transform Windows XP, Vista, 7, 8 & 8.1 into Windows 10
Transform Windows XP, Vista 7, 8 & 8.1 into Mac OS X Mavericks
Transform Windows Vista, 7, 8 & 8.1 into Mac OS X Snow Leopard
This is a Transformation pack to make your XP, Vista, 7, 8 and 8.1 look-n-feel like Mac OS X Yosemite, Which is made by our old friend "WindowsX."
.JPG)
Features:
1. Mac OS X Yosemite icon, Theme, Wallpaper, Booting and Logon Screen for XP/7
2. New Helvetica Neue fonts
3. Taskbar Transparency fade-in
4. Safe Customization of System File
5. Available for all Language Versions
6. Support both 32 bit (x86) 64 bit (x64), and lot more inside
1. Mac OS X Yosemite icon, Theme, Wallpaper, Booting and Logon Screen for XP/7
2. New Helvetica Neue fonts
3. Taskbar Transparency fade-in
4. Safe Customization of System File
5. Available for all Language Versions
6. Support both 32 bit (x86) 64 bit (x64), and lot more inside
Below is the Preview of all the supported OS, Please Check before Downloading.
Windows 8 / 8.1
-White Theme
-White Theme


Windows 7
White Theme
 Black Theme


Windows XP / Vista
This Transformation Pack will also work for XP and Vista, but we don't have any preview of it.
You can Download from the following link:
Download Mac OS X Yosemite Transformation Pack
This Transformation Pack doesn't contain Finder Bar so you can download from the link Below:
Download Finder Bar 1.5.
Labels:
Wallpapers
,
Windows 10
,
Windows 7
,
windows 8
,
windows 8.1
,
Windows Vista
,
Windows XP
How to send a Secured Encrypted Mail from Gmail?
-
Saturday, November 15, 2014
No Comments
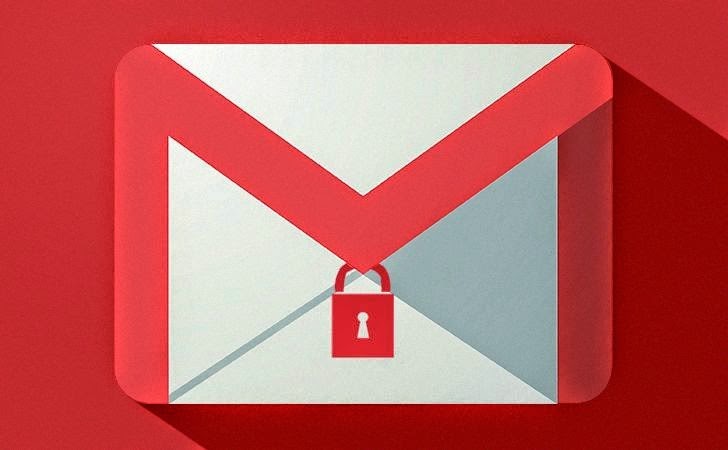 You might don't know that there is a very use trick to Encrypt any Email and send it to your Friend, by which you can make a secure email, which will not open unless you didn't decrypt that email which you have secured by giving a Decrypt Password.
Encryption can be done by using a very useful extension called "Secure Gmail" which only works in Google chrome web browser. This Extension will encrypt your Mail send from your Gmail account and to whom you send that Encrypted Email will receive a Weird Text, which wouldn't have any club to check out what is written inside that Mail, so to Decrypt that Mail. Mail Receivers have to give a Password Assigned by you to read that mail in a normal way.
Currently imagine somebody hacks into your Friends Gmail Account or somebody manages to intercept that email then you just don't need to Worry this Secure Gmail Extension will secure your Mail from all kinds of Threats and Hackers, Because without entering a correct password, there is no way to open and read that Email.
Now to do it, Here we Go... :)
1. "Secure Gmail" Extension is available for Free for Download form the Internet. Download Secure Gmail.
After you install this Extension, you may need to reopen your Chrome browser.
2. Now open you Gmail Account, and there you will see a Lock button next to Compose button.
3. Whenever you want to create Encrypted Email, then click on Lock button.
Type: "your_friends_Gmail_ID", Subject: "your_desire_subject" and type your: "Secret_Message."

5. Important: now tell your Password to your Friends, so that he/she can Decrypt and read your Secret Message.
6. When he/she receives your Encrypted Mail then, it will look like this,
8. Now when your friend type the Password which you have given in Step 4 then only your friends will be able to access that secret message.
How to transform Windows XP, 7, 8 & 8.1 into Windows 10
-
Saturday, November 08, 2014
No Comments
This Transformation pack is for those who like Windows 10 User Interface and want to experience it in their own computer, but don't want to install fresh version of Microsoft OS, so this Article will work out.
You may also like our exclusive Transformation Tutorial:
Transform Windows XP & 7 into Windows 8.1
Transform Windows 7, 8 & 8.1 into Windows 9 (Rumor)
Transform Windows XP, Vista, 7, 8 & 8.1 into Mac OS X Yoesmite
Transform Windows XP, Vista 7, 8 & 8.1 into Mac OS X Mavericks
Transform Windows Vista, 7, 8 & 8.1 into Mac OS X Snow Leopard
This Transformation will make your Windows XP, 7, 8 & 8.1 look-n-feel like Windows 10. This Transformation Pack is made by our old friend "WindowsX."
This Pack contain:
1. Windows 10 icon, Theme, Wallpaper, Booting and Logon Screen for XP/7
2. UxStyle memory patching
3. Safe Customzsation of Genuine Windows 10 System File
4. Custom Start menu for XP, 7, 8/8.1
5. Aero’s auto-colonization Feature, and lot more inside
Required:
2. NET Framework 4.0 - For Newgen


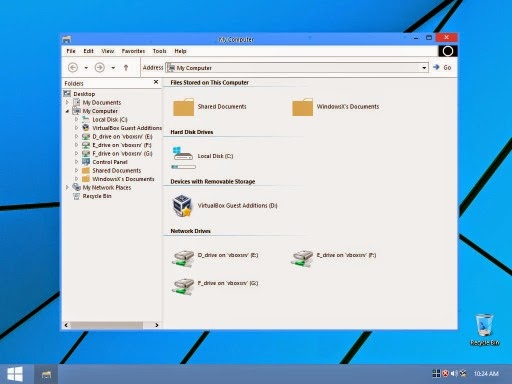
Right Click on Taskbar Start Menu Botton > Setting > Start Menu > under Start Menu Botton Style > Choose Style 1. (Windows 8/8.1)
You may also like our exclusive Transformation Tutorial:
Transform Windows XP & 7 into Windows 8.1
Transform Windows 7, 8 & 8.1 into Windows 9 (Rumor)
Transform Windows XP, Vista, 7, 8 & 8.1 into Mac OS X Yoesmite
Transform Windows XP, Vista 7, 8 & 8.1 into Mac OS X Mavericks
Transform Windows Vista, 7, 8 & 8.1 into Mac OS X Snow Leopard
This Transformation will make your Windows XP, 7, 8 & 8.1 look-n-feel like Windows 10. This Transformation Pack is made by our old friend "WindowsX."
1. Windows 10 icon, Theme, Wallpaper, Booting and Logon Screen for XP/7
3. Safe Customzsation of Genuine Windows 10 System File
4. Custom Start menu for XP, 7, 8/8.1
5. Aero’s auto-colonization Feature, and lot more inside
Required:
1. NET Framework 2.0 - For Start Menu
2. NET Framework 4.0 - For Newgen
Below is the Preview of all the supported OS, Please Check before Downloading
Windows 8/8.1

Windows 7

Windows XP, Vista

This Transformation Pack will also Work on Vista, but we don't have preview of it.
You can Download from the following link:
Download Windows 10 Transformation PackIf you want to change Start Menu Botton
Labels:
Windows 7
,
windows 8
,
windows 8.1
,
Windows Vista
,
Windows XP
Windows 7/ 8 & 8.1 Themes Collection
-
Friday, June 27, 2014
No Comments
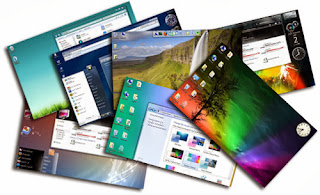
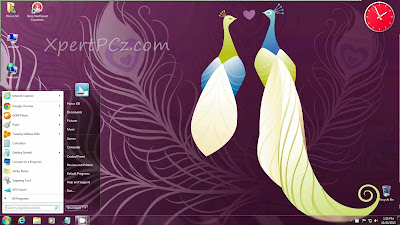
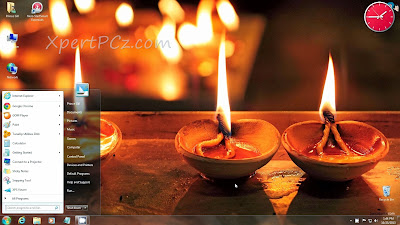
All Microsoft OS is already Very Beautiful but after getting so much of feedback s to upload some New Theme for Windows 7/ 8 & 8.1 now I am going to give you
an Article in which I am
sharing some awesome Themes. Previews and downloading link is
given below so if you like our themes you can download.
Best Of Bing
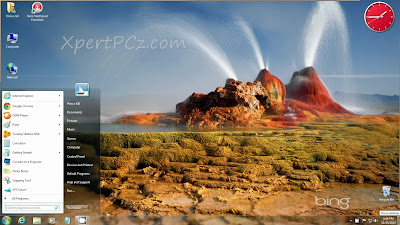
United States
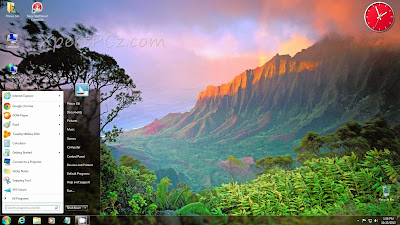
United Kingdom
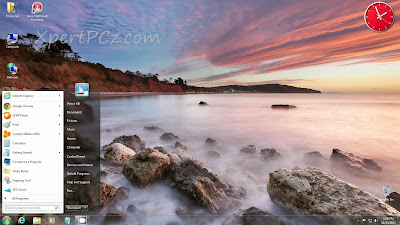
Happy Lights
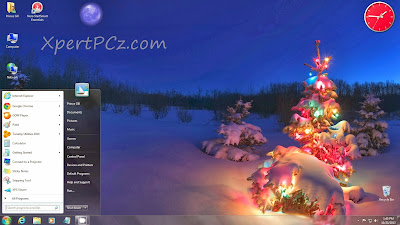
NASA Hidden Universe
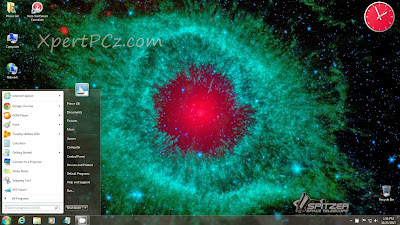
Gars Of War 2
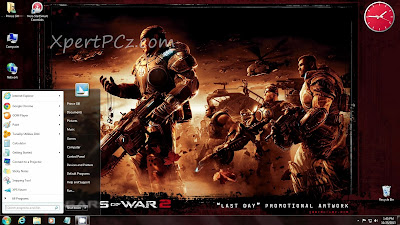
Holiday Lights
Happy Diwali
Now How To Install ?
First Extract the Downloaded *.zip file, and
click on *.themepack file.
That it, If any problem occurs feel free to comment below
Labels:
Wallpapers
,
Windows 7
,
windows 8
,
windows 8.1
How to transform Windows 7, 8 & 8.1 into Windows 9 (Rumor)
-
Monday, June 16, 2014
No Comments
Finally after a lots and lots of feedback from XpertPCz Reader, We are Sharing this Article of Making or Look-n-feel Your Windows 7, 8 and 8.1 in Windows 9.
You may also like our exclusive Transformation Tutorial:
Transform Windows XP & 7 into Windows 8.1
Transform Windows XP, 7, 8 & 8.1 into Windows 10
Transform Windows XP, Vista, 7, 8 & 8.1 into Mac OS X Yoesmite
Transform Windows XP, Vista 7, 8 & 8.1 into Mac OS X Mavericks
Transform Windows Vista, 7, 8 & 8.1 into Mac OS X Snow Leopard
Windows 7 Preview -

Windows 8/8.1 Preview -

You Can Download this From the Following Link :
Download Link
You may also like our exclusive Transformation Tutorial:
Transform Windows XP & 7 into Windows 8.1
Transform Windows XP, 7, 8 & 8.1 into Windows 10
Transform Windows XP, Vista, 7, 8 & 8.1 into Mac OS X Yoesmite
Transform Windows XP, Vista 7, 8 & 8.1 into Mac OS X Mavericks
Transform Windows Vista, 7, 8 & 8.1 into Mac OS X Snow Leopard
Windows 7 Preview -


Support:
Windows 7, 8 and 8.1 - Service Pack 1
x64 and x84 architecture
Download Link
Labels:
Windows 7
,
windows 8
,
windows 8.1
Play Star Wars movie on CMD
-
Saturday, May 24, 2014
No Comments
Command prompt (CMD)is one of the most powerful tool on almost all of the operating system.All graphical functionality actually implemented upon command prompt commands.But most of PC users ignore use of CMD.Today We (Xpert PCz team) are going to post trick where you can watch ASCII version of Star Wars movie on Command Prompt.

To be able to do this trick, you need an internet connection. No matter about speed, it can play even in 20 KB/sec bandwidth connection!
Requirement :-
- Telnet Enabled, How To enable Telnet
- Internet Connection
Here We Go :-
- Open Start-> Run

- Now Type OR Paste "telnet towel.blinkenlights.nl" In Run Box And Hit Enter!

- Done,Your Movie Has Started (Not HD , But Interesting To Fool Friends! )

Watch Video Tutorial
How To Enable Telnet In Windows
I have been doing the "Star Wars Telnet Hack," on the computers at school. However, if
I have been wanting to do it at home, on my Windows Vista / 7 / 8 or 8.1. So We searched around, and found how to enable telnet on Vista / 7 / 8 or 8.1 Platform.


- Open "Start" Menu Search "Windows Features"

- Click on "Turn Windows Features On or Off"
- Now a new window opens. In the new window, Tick On "Telnet Client" And Click on "Ok". It Will Take Time To Setup.

Done, Now you Can use Telnet Service on your CMD.
Watch Video Tutorial:-
Labels:
Softwares
,
Tutorials
,
Windows 7
,
windows 8
,
windows 8.1
,
Windows Vista
,
Windows XP
Subscribe to:
Comments
(
Atom
)


